Making sourdough bread in a cast iron Dutch oven is a process that yields a fantastic crust and a wonderfully chewy crumb, thanks to the even heat distribution and steam retention the Dutch oven provides. It’s an accessible way to achieve bakery-quality bread at home.
A good sourdough loaf begins with an active, healthy starter. This isn’t just flour and water; it’s a living ecosystem of wild yeasts and bacteria that give sourdough its distinctive flavor and leavening power.
Understanding Your Starter
Your starter should be fed regularly and show signs of activity. When it’s ready to bake, it will be bubbly, smell pleasantly tangy (like yogurt or ripe fruit), and pass the float test – a small spoonful dropped into water should float. If it sinks, it might need another feeding or more time to mature. This activity indicates a robust microbial population ready to consume sugars in your dough and produce carbon dioxide, which creates those desirable air pockets.
Feeding Your Starter
Typically, a starter is fed a 1:1:1 ratio of starter, water, and flour by weight. For example, 50 grams of active starter, 50 grams of water, and 50 grams of bread flour. Allow it to rise at room temperature until it peaks, which can take anywhere from 4 to 12 hours depending on the ambient temperature and the starter’s activity. For baking, you’ll want to use your starter when it’s at its peak or just beginning to recede, as this is when its leavening power is strongest.
If you’re looking to elevate your sourdough baking experience, consider exploring the intricacies of using a cast iron Dutch oven for baking bread. This method not only helps in achieving a perfect crust but also retains moisture, resulting in a beautifully baked loaf. For more tips on mastering sourdough and ensuring perfect loaves every time, check out this insightful article: Mastering the Art of Sourdough: Tips for Perfect Loaves Every Time.
Basic Sourdough Dough: Ingredient Breakdown and Mixing
The beauty of sourdough lies in its simplicity: flour, water, salt, and starter. However, the quality of these ingredients and the method of mixing make a significant difference.
Flour Selection
Bread flour is generally recommended due to its higher protein content, which contributes to a stronger gluten network. This strength is crucial for trapping the gases produced by the starter, leading to a good rise and open crumb. All-purpose flour can be used, but the results might be a bit denser. Whole wheat or rye flour can be incorporated for flavor and nutrition, but they will affect hydration and gluten development, often requiring slight adjustments to the water content or handling.
Water Temperature
The temperature of your water influences the dough’s final temperature, which in turn impacts fermentation speed. Aim for water around 80-85°F (27-29°C) to achieve a dough temperature in the ideal range of 75-78°F (24-25°C). This temperature range promotes optimal yeast and bacteria activity without over-proofing or under-proofing the dough. In colder environments, warmer water may be beneficial, and conversely, in warmer environments, cooler water might be needed.
Salt’s Role
Salt is not just for flavor; it also strengthens the gluten structure and regulates fermentation. Without salt, yeast activity can run rampant, resulting in a sticky, unmanageable dough that over-proofs quickly and lacks structure. Too much salt can inhibit yeast activity, leading to a dense loaf. A typical range is 1.8-2.2% of the flour weight.
The Mixing Process: Autolyse and Folding
Autolyse: This involves mixing flour and water together and letting it rest for 30 minutes to an hour before adding the starter and salt. This resting period allows the flour to fully hydrate and enzymes to begin breaking down starches, which simplifies gluten development. It also makes the dough easier to work with.
Incorporating Starter and Salt: After the autolyse, gently mix in the active starter and then the salt. Knead until everything is evenly distributed. This can be done by hand or with a stand mixer on low speed.
Stretch and Folds: Instead of traditional kneading, sourdough often relies on a series of “stretch and folds” during the bulk fermentation. These gentle manipulations build strength in the dough without overworking it. Typically, you’ll perform 3-4 sets of stretch and folds every 30-45 minutes. To do this, lightly wet your hands, gently pull a section of the dough up from the bowl, stretch it, and fold it over onto itself. Rotate the bowl and repeat until you’ve gone around the whole dough once.
Bulk Fermentation: The Crucial Rise
Bulk fermentation, also known as the first rise, is a critical stage where the dough develops flavor and strength. This is where the starter truly gets to work, producing gases and organic acids.
Temperature Control
The ambient temperature significantly impacts how quickly your dough ferments. A warmer environment (around 75-78°F or 24-25°C) will speed up fermentation, while a cooler environment (around 68-72°F or 20-22°C) will slow it down, allowing for more flavor development and potentially more manageable handling. Using a proofing box or placing your dough in a slightly warm, draft-free spot can help maintain a consistent temperature.
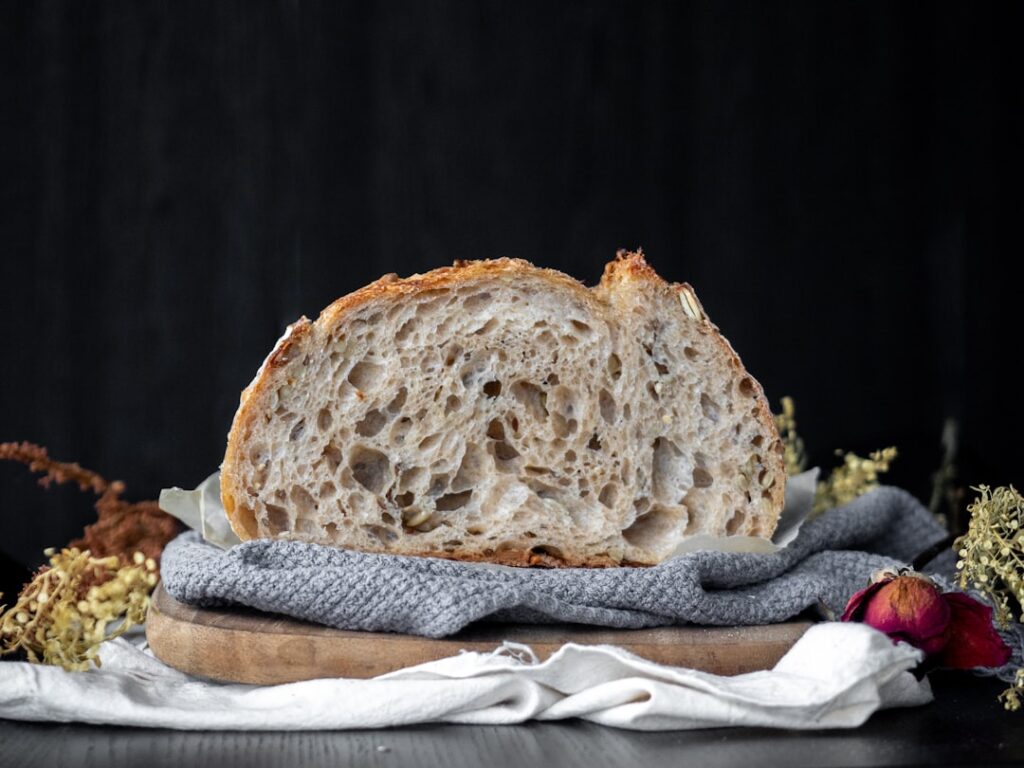
Visual Cues for Doneness
During bulk fermentation, your dough should increase visibly in volume, typically by 30-50%. It should also feel airy and have some sporadic bubbles on the surface. The ‘jiggle test’ is also helpful: gently shake the bowl; if the dough jiggles uniformly like a large mound of jelly, it’s likely ready. It should not feel overly gassy or have a sour, alcoholic smell, which could indicate over-proofing.
Avoiding Over-Proofing
Over-proofed dough becomes slack, difficult to handle, and can result in a dense, gummy loaf with little oven spring. Under-proofed dough, conversely, will be tight, tear easily during shaping, and likely result in a dense loaf with a tight crumb. Learning to gauge the right moment comes with practice and observation of your specific environment and starter.
Shaping and Cold Proofing
After bulk fermentation, the dough is gently shaped and then usually undergoes a cold proof in the refrigerator. This stage continues flavor development and helps regulate the dough for easier handling.
Pre-Shaping
Gently turn the dough out onto a lightly floured surface. Divide it if making multiple loaves. Without degassing it much, form a loose round or oblong shape. This helps to organize the gluten structure and makes the final shaping easier. Let it rest for 15-20 minutes, covered, to allow the gluten to relax.
Final Shaping
This is where you create the final structure of your loaf. The goal is to build surface tension, which will contribute to a good oven spring and a pleasing shape. For a boule (round loaf), gently flatten the dough into a disc, then fold the edges towards the center, creating tension on the surface. Flip it over and cup your hands around it, rotating it on the counter to tighten the ball. If making a batard (oblong loaf), shape it similar to a baguette.
The Benefits of Cold Proofing
Flavor Development: The cold environment slows down yeast activity while allowing beneficial bacteria to continue producing acids, enhancing the sourdough’s characteristic tang.
Easier Handling: Cold dough is firmer and less sticky, making it much easier to score (slash) before baking.
Improved Oven Spring: The cold dough hits the hot oven, creating a greater temperature differential, which leads to a more dramatic rise—oven spring.
Proof your shaped dough in a floured banneton (proofing basket) or a bowl lined with a floured cloth. Cover it tightly and refrigerate for 8-24 hours. The longer the cold proof, generally the more developed the flavor.
If you’re interested in perfecting your cast iron dutch oven sourdough bread, you might find it helpful to explore a related article that delves into the intricacies of sourdough baking techniques. This resource offers valuable insights and tips that can elevate your baking skills. For more information, you can check out this informative piece on sourdough baking at Sourdough Calculator.
Baking in the Cast Iron Dutch Oven
| Metric | Value |
|---|---|
| Preparation Time | 15 minutes |
| Cooking Time | 45 minutes |
| Yield | 1 loaf |
| Calories per Serving | 150 |
| Protein per Serving | 5g |
The Dutch oven creates a perfect baking environment, trapping steam and distributing heat evenly, which is key to a beautiful crust and good oven spring.
Preheating the Dutch Oven
This is a critical step. Place your empty Dutch oven with its lid in your oven and preheat to a high temperature, typically 450-500°F (232-260°C), for at least 30-60 minutes. This ensures the Dutch oven is thoroughly heated through, which provides an immediate burst of heat to the dough. The high initial heat helps to set the crust quickly and achieve maximum expansion.
Transferring the Dough and Scoring
Carefully remove the hot Dutch oven from the oven. Gently transfer your cold, proofed dough from the banneton into the hot Dutch oven. The cold dough directly into the hot pot helps prevent sticking and contributes to the excellent crust.
Scoring: Using a sharp razor blade (lame) or a very sharp knife, make a deep slash (or slashes) on the top of your dough. This controlled cut allows the dough to expand predictably during baking, preventing uncontrolled tearing and creating a beautiful pattern. For boules, a single slash across the top is common. For batards, multiple parallel slashes are typical. The depth and angle of your score will impact the final expansion and appearance of the crust.
The Covered and Uncovered Bake
Covered Bake: Bake the dough with the lid on for the first 20-25 minutes. The lid traps the steam released by the dough, creating a humid environment similar to a professional steam oven. This steam keeps the crust soft and pliable initially, allowing the dough to expand fully without forming a hard crust too early. This is crucial for maximum oven spring.
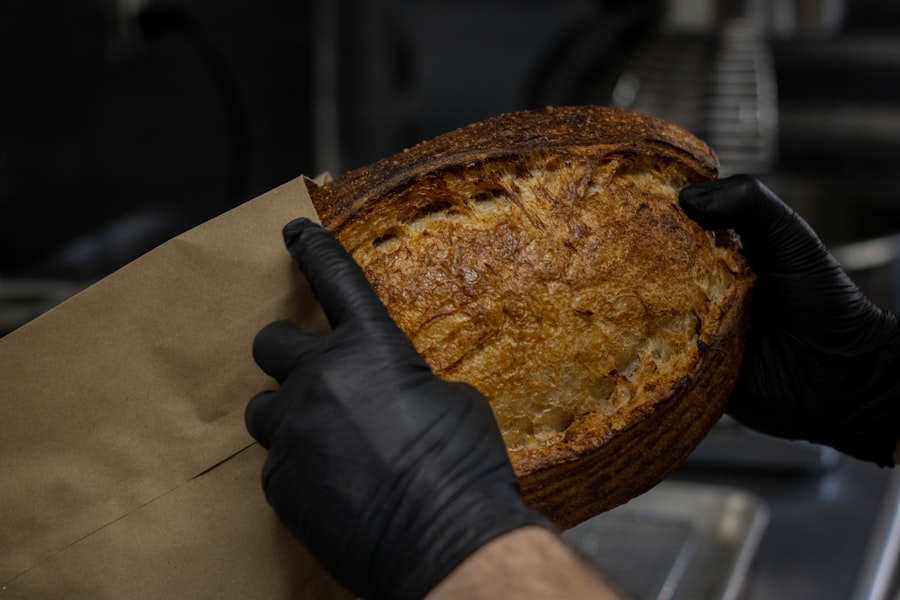
Uncovered Bake: After the initial covered period, carefully remove the lid. Reduce the oven temperature slightly (typically to 425-450°F or 218-232°C) and continue baking for another 20-30 minutes, or until the crust is deeply golden brown and sounds hollow when tapped on the bottom. During this phase, the direct heat causes the crust to dry out and crisp up, developing its characteristic color and texture. An internal temperature of 200-210°F (93-99°C) is a good indicator of doneness.
Cooling and Storage
Cooling: Resist the urge to cut into your bread immediately. Placing it on a wire rack to cool completely for at least 1-2 hours is essential. During cooling, carryover cooking finishes the baking process, and moisture redistributes throughout the loaf. Cutting too early can result in a gummy crumb.
Storage: Store sourdough bread at room temperature, ideally in a bread box or a paper bag, for 2-3 days. For longer storage, slice the cooled loaf and freeze the slices in an airtight bag. Toasting from frozen works wonderfully. Avoid storing sourdough in the refrigerator, as it can accelerate staling.