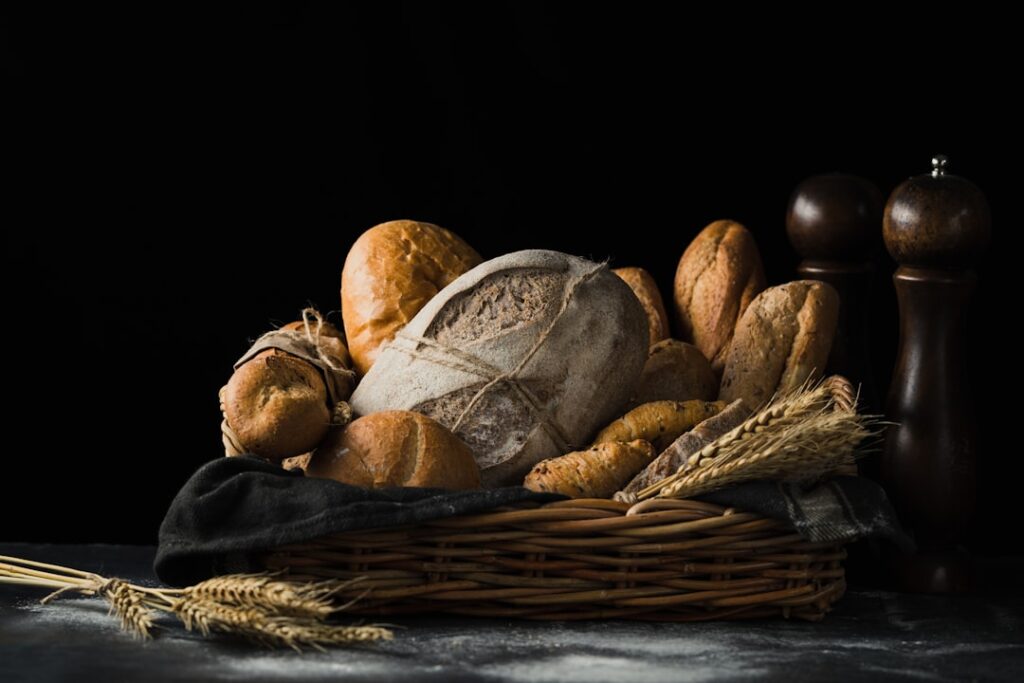
Sourdough bread, a fermented bread made from a sourdough starter, has experienced a resurgence in popularity. This article aims to provide a comprehensive guide to mastering basic sourdough bread, suitable for individuals with varying levels of baking experience. It details the steps involved, from maintaining a starter to baking a loaf, emphasizing fundamental techniques rather than complex variations.
A sourdough starter is a living culture of wild yeast and lactic acid bacteria, essential for leavening sourdough bread. It acts as a natural leavening agent, providing rise and contributing to the bread’s characteristic flavor profile. Maintaining a healthy starter is paramount to successful sourdough baking.
Starter Composition and Activity
A mature sourdough starter typically consists of equal parts flour and water by weight, although hydration levels can vary. The wild yeast present in the flour, naturally occurring in the environment, ferments the starches in the flour, producing carbon dioxide gas and alcohol. Lactic acid bacteria, also present, produce lactic and acetic acids, which contribute to the distinctive sour flavor of sourdough. A healthy starter will exhibit consistent activity: it will double or triple in size after feeding, display a frothy, bubbly texture, and possess a pleasant, slightly acidic aroma. Lack of activity, a thin consistency, or an unpleasant smell indicates a need for adjustment in feeding schedule or environment.
Feeding Your Starter
Regular feeding is crucial for maintaining a robust starter. The frequency of feeding depends on storage conditions. For a starter kept at room temperature, daily feeding is generally recommended. When stored in the refrigerator, feeding once a week may suffice. The feeding ratio typically involves discarding a portion of the old starter and replenishing it with fresh flour and water. A common ratio is 1:1:1 (starter:flour:water by weight). For example, if you have 50 grams of starter, you would feed it with 50 grams of flour and 50 grams of water. This process dilutes the metabolic waste products and provides fresh nutrients for the microorganisms.
Storage Options
Starters can be stored at room temperature or in the refrigerator. Room temperature storage encourages more frequent feeding and a more active starter, suitable for regular baking. Refrigeration slows down the metabolic activity of the microorganisms, reducing the frequency of feeding required. When retrieving a refrigerated starter for baking, it is advisable to perform one or two “revival feeds” at room temperature to restore its full activity before use. This process involves bringing it to room temperature and feeding it once or twice over 12-24 hours.
If you’re looking to elevate your sourdough baking skills, check out this informative article on Mastering the Art of Sourdough: Tips for Perfect Loaves Every Time. It offers valuable insights and techniques that complement the basics of sourdough bread making, helping you achieve that perfect crust and crumb. Whether you’re a beginner or an experienced baker, this resource will guide you in refining your sourdough process for consistently delicious results.
Mixing and Autolysing Your Dough
The initial stages of sourdough bread making involve mixing the starter with flour and water, followed by a resting period known as autolysis. These steps are fundamental for developing gluten and initiating fermentation.
Combining Ingredients
Accurate measurement of ingredients is crucial for consistent results. Use a digital kitchen scale for precise measurements of flour, water, and starter. Begin by incorporating the active sourdough starter into the water. Ensure the starter is fully dissolved or dispersed in the water before adding the flour. This helps to distribute the yeast and bacteria evenly throughout the dough. Gradually add the flour, mixing until a shaggy, cohesive mass forms. Avoid overmixing at this stage; the goal is simply to combine the ingredients. The dough will likely appear rough and sticky.
The Autolyse Stage
Autolysis is a resting period for the dough, typically lasting 30 minutes to an hour, after the initial mixing of flour and water but before the addition of salt. During autolysis, the flour absorbs the water, and enzymes naturally present in the flour begin to break down complex carbohydrates into simpler sugars, providing readily available food for the yeast. More significantly, gluten development begins passively. The proteins in the flour, glutenin and gliadin, start to link together and form gluten strands without active manipulation. This process leads to a more extensible and elastic dough, requiring less strenuous kneading later on. Essentially, autolysis allows the dough to do some of the work itself, improving the texture and workability.
Incorporating Salt
Salt plays a critical role in sourdough bread. It not only enhances flavor but also strengthens the gluten structure and regulates fermentation. Salt should be added after the autolyse period. If added too early, it can interfere with the enzymatic activity during autolysis and inhibit yeast activity. After the autolyse, sprinkle the salt over the dough and gently work it in. This can be achieved through a series of “folds” or light kneading. Ensure the salt is evenly distributed throughout the dough.
Developing Gluten Through Folding and Resting
Once the initial mixing and autolyse are complete, the dough requires further manipulation to develop a strong gluten network. This is achieved through a series of “stretch and fold” or “coil fold” techniques, interspersed with resting periods. These actions strengthen the dough’s structure, allowing it to trap gases produced during fermentation, which in turn contributes to the bread’s rise and open crumb.
Stretch and Fold Technique
The stretch and fold technique is a gentle method of developing gluten. It involves wetting your hands to prevent sticking, then taking a portion of the dough from the edge, stretching it upwards, and folding it over the center of the dough. Rotate the bowl 90 degrees and repeat this action several times, typically 4 to 6 folds per set. This process should be performed evenly around the perimeter of the dough. The frequency of stretch and folds depends on the dough’s strength and hydration, but typically 3-4 sets are performed over a period of 2-3 hours, with individual 30-minute resting periods between each set. Each set progressively builds more tension and strength in the dough.
Coil Fold Technique
The coil fold technique is an alternative to the stretch and fold, particularly effective for high-hydration doughs. To perform a coil fold, wet your hands and slide them underneath the center of the dough, lifting it gently. The dough will stretch and sag like a hammock. Then, gently bring the ends of the dough together, allowing it to fold in on itself, forming a tighter ball. Carefully place the dough back in the bowl seam-side down. Similar to stretch and folds, coil folds are performed in a series over the bulk fermentation period, also with resting intervals. Both techniques aim to develop strength and elasticity, which are crucial for trapping the gas produced by fermentation.
Bulk Fermentation (First Rise)
Bulk fermentation, also known as the first rise, is a critical stage where the majority of the dough’s flavor and structure development occurs. During this period, the yeast and bacteria actively ferment the sugars in the flour, producing carbon dioxide gas. This gas is trapped within the developing gluten network, causing the dough to rise. The duration of bulk fermentation is influenced by several factors: ambient temperature, the activity of your starter, and the desired flavor profile. Warmer temperatures accelerate fermentation, while cooler temperatures slow it down. A general guideline is to allow the dough to increase by 30-50% in volume. Over-fermentation can lead to a dense, gummy crumb and a sour taste. Under-fermentation results in a dense crumb and insufficient rise. Observing the dough’s visual cues – an increase in volume, a bubbly surface, and a slight doming – is more reliable than strictly adhering to a time limit.
Shaping and Proofing Your Loaf

After bulk fermentation, the dough is gently shaped into its final form and then undergoes a secondary fermentation called proofing. Proper shaping builds tension and creates a good crust, while proofing allows the dough to gain final volume and develop further flavor.
Pre-Shaping
Pre-shaping is an intermediate step performed after bulk fermentation. It aims to gently organize the dough, build initial tension, and prepare it for the final shaping. Turn the dough out onto a lightly floured surface. Gently form it into a loose round or rectangle, depending on the final shape you intend to bake. Avoid aggressive handling, which can deflate the air pockets that have formed during bulk fermentation. Allow the pre-shaped dough to rest for 15-30 minutes, uncovered, at room temperature. This resting period, known as bench rest, allows the gluten to relax, making the dough easier to handle in the final shaping stage. This stage is akin to stretching out a rubber band before attempting to tie a knot; the relaxation makes it much more manageable.
Final Shaping Techniques
Final shaping is crucial for creating a loaf with good structure and a beautiful crust. The goal is to create surface tension while avoiding tearing the dough. Two common shaping techniques are the “boule” (round) and the “batard” (oval).
For a boule:
- Gently flatten the dough into a rough circle.
- Fold the top third of the circle down towards the center.
- Fold the bottom third up and over the previous fold.
- Rotate the dough 90 degrees.
- Repeat the folding process, creating a tight ball.
- Use the palms of your hands to gently cup the dough and rotate it on the counter, creating surface tension.
For a batard:
- Gently flatten the dough into a rough rectangle.
- Fold the top third of the rectangle down towards the center.
- Fold the bottom third up and over the previous fold.
- Gently roll the dough from one end to the other, creating a log.
- Use your hands to gently seal the seam and create tension along the length of the batard.
The key across both is to build tension on the surface without deflating the internal gas pockets. This surface tension acts as a skin, holding the dough’s shape during baking and contributing to oven spring.
Cold Proofing (Retarding)
After final shaping, the dough is placed into a proofing basket (banneton) seam-side up and typically undergoes cold proofing, also known as retarding, in the refrigerator. This slow, cool fermentation offers several advantages:
- Flavor Development: The longer, cooler fermentation allows for a greater development of complex flavors, particularly the characteristic sour notes of sourdough.
- Convenience: It allows you to bake on your schedule, as the dough can be held in the refrigerator for 12-48 hours.
- Easier Handling: Cold dough is firmer and less sticky, making it easier to score and transfer to a hot baking vessel.
- Improved Oven Spring: The cold dough enters a hot oven, creating a significant temperature differential that promotes a rapid expansion of gases and a superior oven spring.
While room temperature proofing is an option, it requires vigilant monitoring as the dough can quickly overproof, leading to a dense crumb. Cold proofing provides a more forgiving and often superior result for basic sourdough.
If you’re looking to enhance your sourdough baking skills, you might find it helpful to explore a related article that delves into the science behind fermentation and how it affects the flavor and texture of your bread. Understanding these principles can elevate your baking experience and lead to more delicious results. For more insights, check out this informative piece on sourdough baking techniques at Sourdough Calculator.
Baking Your Sourdough Bread
| Metric | Value | Unit | Notes |
|---|---|---|---|
| Flour Weight | 500 | grams | Typically bread flour or all-purpose flour |
| Water Weight | 350 | grams | 70% hydration level |
| Sourdough Starter | 100 | grams | Active and bubbly starter |
| Salt | 10 | grams | About 2% of flour weight |
| Bulk Fermentation Time | 4-6 | hours | At room temperature (~21°C / 70°F) |
| Proofing Time | 2-4 | hours | Final rise before baking |
| Baking Temperature | 230 | °C | Preheated oven with steam |
| Baking Time | 30-40 | minutes | Until crust is golden brown |
| Internal Bread Temperature | 96 | °C | Indicates fully baked bread |
Baking sourdough bread involves a hot environment, often with steam, to achieve a well-risen loaf with a crisp crust and an open crumb.
Preheating Your Oven and Baking Vessel
A consistently hot oven is crucial for successful sourdough baking. Most sourdough recipes call for baking in a Dutch oven or a covered baking pot. Preheat your oven to a high temperature, typically 450-500°F (230-260°C), for at least 30-60 minutes with the Dutch oven inside. This ensures that the vessel itself is thoroughly heated, providing an even blast of heat to the dough. The heat stored in the Dutch oven contributes significantly to achieving good oven spring. You are essentially creating a small, enclosed oven environment within your larger oven.
Scoring the Dough
Scoring, the act of cutting the surface of the dough with a sharp blade (lame) just before baking, serves several purposes:
- Controlled Expansion: Scoring directs where the dough will expand during oven spring. Without scoring, the crust can tear irregularly, resulting in a less aesthetically pleasing loaf.
- Aesthetics: Intentional scoring allows for artistic expression and creates patterns on the crust.
- Steam Release: It allows steam trapped within the dough to escape, preventing the crust from becoming too dense or tough.
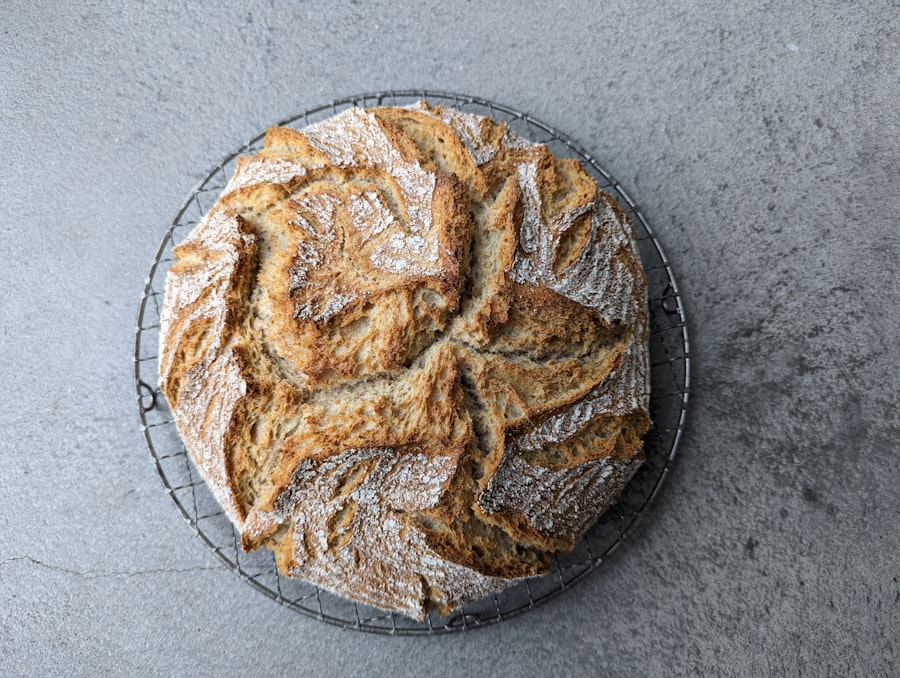
Common scoring patterns include a single long slash down the middle for a batard, a cross for a boule, or more intricate designs. The depth and angle of the score influence the final appearance of the bloom (the opening of the score). A depth of 1/4 to 1/2 inch is generally appropriate.
Baking with Steam
The initial phase of baking, typically for the first 20-25 minutes, requires a moist environment. This steam is critical for a few reasons:
- Crust Development: Steam keeps the surface of the dough moist, preventing it from drying out and forming a hard crust too early. A pliable crust allows the dough to expand maximally during oven spring.
- Flavor and Texture: Steam gelatinizes the starches on the surface, contributing to a shiny, crisp crust and enhancing flavor.
Baking in a covered Dutch oven effectively traps the steam released by the dough itself. If baking on a baking stone, alternative methods for creating steam include placing a pan of hot water in the oven or spraying the oven walls with water. However, the Dutch oven method is generally more reliable and simpler for home bakers.
Removing the Lid and Finishing the Bake
After the initial steamed baking period (e.g., 20-25 minutes), remove the lid of the Dutch oven. This allows the steam to escape and promotes crust development. Continue baking for another 20-30 minutes, or until the crust is deeply golden brown and the internal temperature reaches 200-210°F (93-99°C). Rotate the Dutch oven halfway through this stage to ensure even browning. The final stage of baking is about drying out the crust and ensuring the interior is fully cooked. If the crust is browning too quickly, you can reduce the oven temperature slightly or place a sheet of foil over the loaf.
Cooling and Storage
Proper cooling and storage are essential for preserving the quality and flavor of your freshly baked sourdough bread. Patience at this stage is key.
The Importance of Cooling
Once removed from the oven, sourdough bread needs to cool completely on a wire rack. This is a non-negotiable step that can take 2-4 hours, or even longer for a very large loaf. During cooling, several critical processes occur:
- Moisture Distribution: The internal temperature of the bread remains high, and steam continues to circulate throughout the loaf. This allows the moisture to redistribute evenly, preventing a gummy interior and ensuring a consistent texture.
- Flavor Development: As the bread cools, the complex flavors created during fermentation and baking continue to mature and develop. Cutting into hot bread can result in a loss of moisture and a less developed flavor profile. You are aiming for a fully “set” crumb.
Resisting the urge to slice into a hot loaf is perhaps the most challenging part of the entire process, but it is as important as any other step in achieving the desired final product.
Storing Your Sourdough
Sourdough bread is best consumed within 2-3 days of baking. For optimal freshness, store it at room temperature, ideally wrapped in a clean kitchen towel, a linen bread bag, or in a paper bag. Avoid airtight containers or plastic wraps during the immediate storage as they can trap moisture and soften the crust prematurely.
For longer storage, sourdough bread freezes exceptionally well. Once cooled completely, slice the loaf and place the slices in a freezer-safe bag or container. You can also freeze the entire loaf. Thaw slices at room temperature or toast directly from frozen. Frozen sourdough can maintain its quality for several weeks to a few months. Refrigeration is generally not recommended for sourdough, as it tends to dry out the bread quickly and changes its texture unfavorably.
By adhering to these fundamental principles and practices, you can consistently produce high-quality sourdough bread. Mastery of the basic loaf provides a solid foundation for exploring more advanced techniques and variations in sourdough baking.